Configuring LVM Storage for QEMU/KVM VMs Using virt-manager on CentOS 7
While this can be done in the command line, I have yet to attempt this myself as I was more focused on completing my RHCSA objectives for the Red Hat exam I plan to take soon. I was told that GUI should be available on the test. I hope to write a How-To on this via virsh and virt-install commands in the near future. This tutorial is loosely based on this blog post I read: https://chrisirwin.ca/posts/discard-with-kvm/.
You may wonder why I’m using LVM storage for the virtual machines rather than the ‘raw’ or ‘qcow2’ files in the libvirt default directory, /var/lib/libvirt/images/. I’ve solicited the web for the most efficient use of my SSD with libvirt on QEMU/KVM hypervisor stack to store my VMs. Some people have suggested ZFS and Btrfs, but I’ve decided against it now for few reasons. I’m trying to stick with the RHCSA objectives as much as possible and try not to stray from what I really need to focus on at the moment. I’ve also read that Btrfs is not stable for production use and have some compatibility issues. ZFS for Linux wasn’t natively supported until just recently when Canonical released the latest Ubuntu LTS version 16.04 with ZFS built-in by default. I was also aware of the licensing issue as ZFS was originally for UNIX/BSD. Bottom line is that I don’t have time to experiment with those filesystems/partition tables.
By default, you’d have your VM guest OS with a filesystem within a raw image file that’s stored on your host filesystem. That’d make three layers, and your VM guest’s filesystem would be nested, which is kind of a silly redundancy here. Why not give your guest VMs the same storage efficiency as your host OS? It’d make sense to allocate LVM partitions to the guest VM to use as block devices to mount its filesystem so this way you don’t have a nested filesystem.
Setting up LVM partitions:
For this tutorial, I assume you have basic proficiency configuring LVM and configuring partitions on physical disk from the command line and familiarity with virt-manager.
First, before we get started, you’d have to have available partitions on your physical drive. SSD would make a good choice of physical drive here. I’d recommend to have GPT configured on the drive if your machine supports it as you can have more partitions than what MBR partition table can offer. You must assign the ‘LVM’ type to the partitions you want to use. Use type 8e for fdisk utility, and 8e00 for gdisk utility. It’s important that you mark those partitions as LVM as later steps won’t work if you don’t.
Setting up LVM storage pool with virt-manager:
Proceed to creating a VM as you normally would. When you reach step 4 out of 5, select the option, “Select managed or other existing storage.” Make sure that “Enable storage for this virtual machine” checkbox is checked before clicking on ‘Browse’.
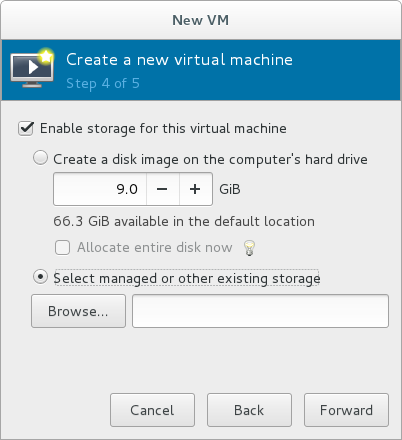
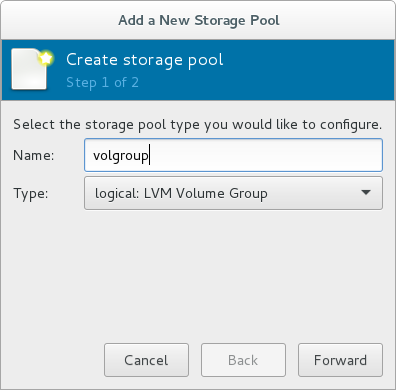
At the “Choose Storage Volume” dialog, click on ‘Add Pool’ button with the plus symbol on the bottom left of the dialog. You’ll be prompted to add a storage pool. Type the name you would use for your LVM volume group for the storage pool name as this would make a good naming practice. Although, naming consistency is not required here. Select the type, ‘logical: LVM Volume Group’ then move forward.
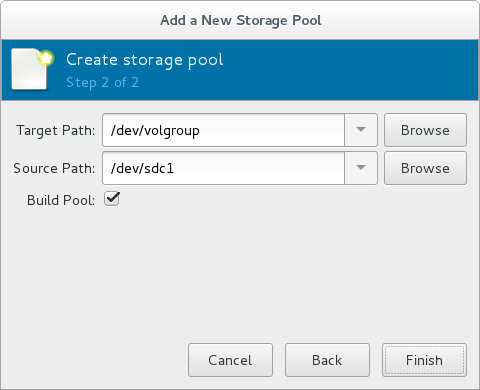
The target path should be ‘/dev/
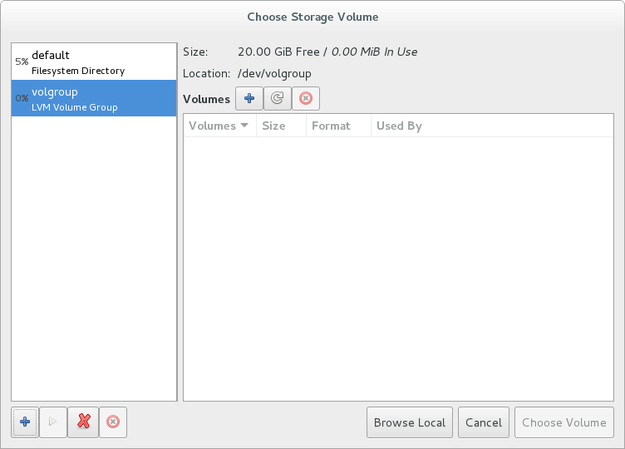
Now you are able to see the size and the available sizes of the partition you chose to create your volume group on. Click on ‘Create new volume’ plus symbol button on the top to add the logical volume. You’ll get the ‘Add a Storage Volume’ window dialog.
The ‘Name’ would be the logical volume name, and you can set the desired size. This logical volume will appear as a single hard disk within the VM guest. Later you can add more hard disks to the VM and set the desired mount points on each drive.
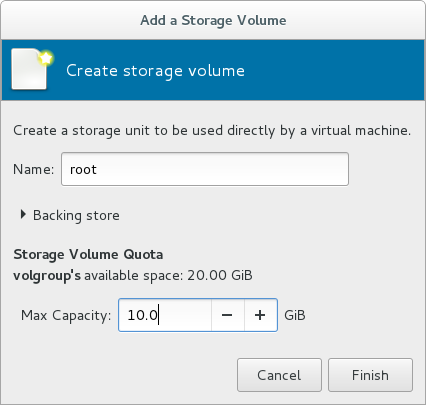
As you can see, you can create as many logical volumes as you like within the storage capacity of that volume group.
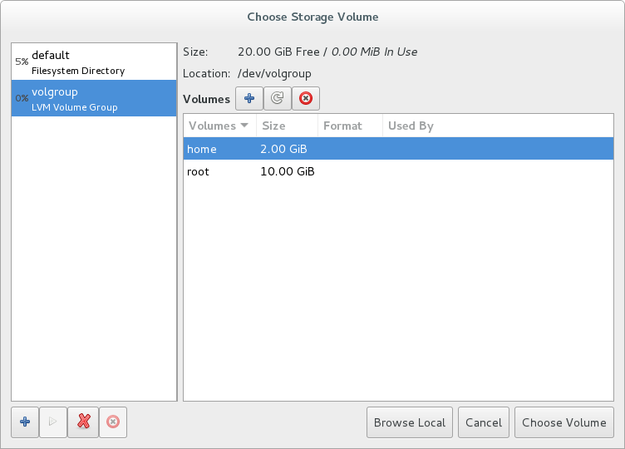
Adding more hard drives to VM:
As you read this, you may disagree with the storage design I just used. In this guide, I used one block device (one logical volume) for each mount point. This may seem like a terrible way to set up the VM, but I set it that way just for demonstration. You can substitute ‘home’ and ‘root’ labels for ‘sda’ and ‘sdb’ respectively, which would make a lot more sense here as you’d partition the “block devices” within the guest however you like.
As I promised, I’ll demonstrate how you can add more hard drives to your VM. While this is rather trivial for most power users, I’ll specifically address the pitfalls you should avoid.
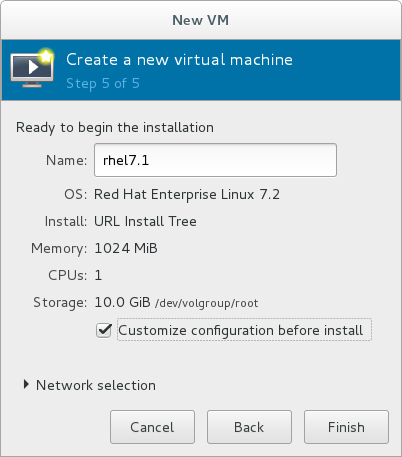
After you have chosen a logical volume to use (you can only choose one for now during the initial step), you’d get a prompt that you are ready to begin the installation.You can name your VM however you like. You’d need to check the ‘Customize configuration before install’ checkbox before moving on to be able to add more hard drives.
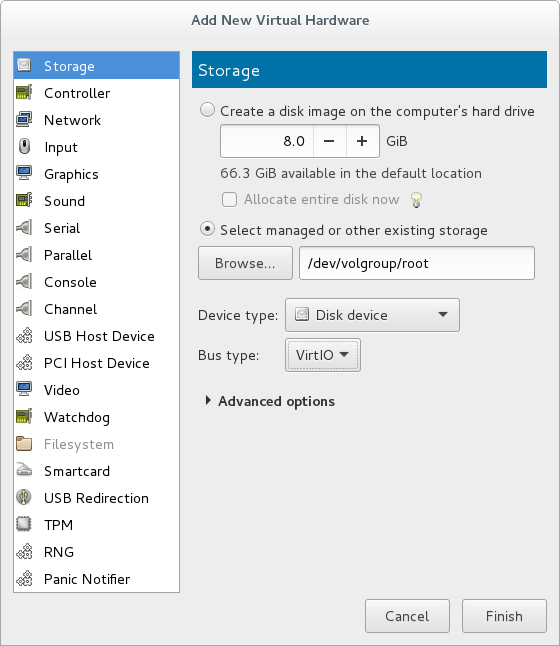
You should be at the screen with all attached hardware shown on the left pane. Click on ‘Add Hardware’ button, and you’ll be prompted with “Add New Virtual Hardware” window. Select the ‘Storage’ item in the left pane, and you’ll see few options there that are very similar to the ones you see in the first snapshot of this guide. Check the ‘Select managed or other existing storage’ checkbox. Be sure to have the ‘Device type’ set to ‘Disk device’ then click on ‘Browse’ button to select appropriate storage. You’ll see familiar window again. The rest of the steps are self-explanatory as we’ve been through it. We do not need to modify anything in ‘Advanced options’ here.
Optimize disk configuration:
One of the pitfalls you’d need to look out for is not being able to pass the TRIM command from the guest VM down to the LVM partitions on the host if you are using SSD. If you are not using the correct disk bus type and controller type for your drives attached to the VM, then you won’t be able to trim correctly.
Open your VM hardware setting and select the disk item in the left pane to modify its setting. It may be labeled ‘VirtIO Disk 1’. Decollapse the ‘Advanced options’ to set the ‘Disk bus’ option to ‘SCSI’. Be sure to click on ‘Apply’ button to save the change.
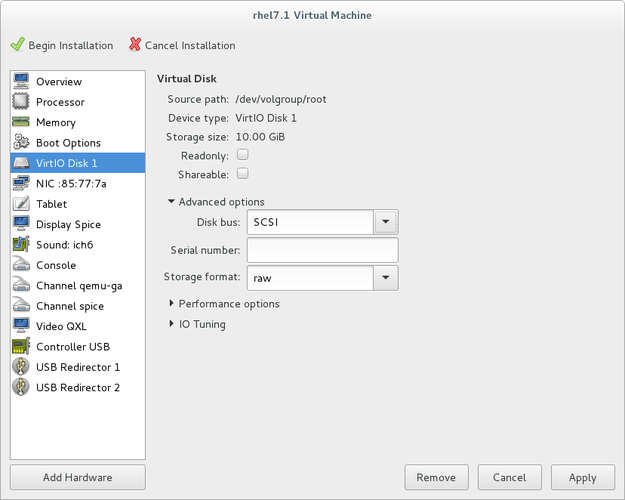
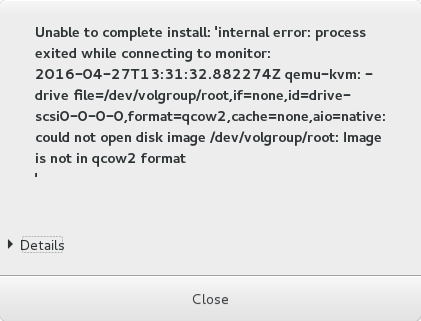
You may notice the ‘Storage format’ option is set to ‘raw’. This is correct and you should leave it that way. Apparently you can’t write a ‘qcow2’ image file directly to the LVM partition without a filesystem on it. You’d get an error like the one below when attempting to complete the install. With that being said, ‘qcow2’ is not much better than LVM.
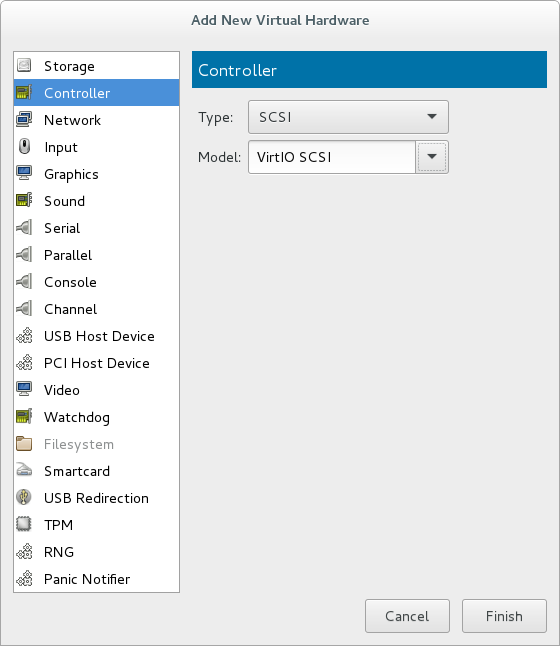
Before we proceed to installing, you’d also need to attach the appropriate controller hardware so that your emulated SCSI disk can communicate with the system bus. Revisit the VM hardware setting and add a new hardware. You’d only need one SCSI controller for all of your SCSI disks if you have more than one disk. When you are prompted to “Add New Virtual Hardware”, select the ‘Controller’ item in the left pane. The controller type should be ‘SCSI’ and the model should be ‘VirtIO SCSI’. Click on ‘Finish’ to attach the new controller to your VM.
Now you can proceed to the installation. Although, you’d need to do few more things to successfully configure TRIM. After powering off the virtual machine, you’d need to use the command line to modify the configuration in the XML file that virt-manager couldn’t let us modify. You need to change the ‘discard’ option for all the disk devices to enable TRIM. You can do so by running the command:
virt-xml test --edit all --disk discard=unmap
Lastly, you’d need to enable the fstrim.timer with systemctl for your guest OS in your VM if you’re using CentOS 7 or a distro with systemd. Please refer to my article on ‘fstrim’ if you are unsure how. Now you are all done.
Heads up:
If you ever decide to delete your virtual machines, all the associated logical volumes would be deleted. However, the volume group would remain.
If you ever have trouble removing the storage pool from the “Choose Storage Volume”, then you can remove the appropriate storage pool XML files from the ‘etc/libvirt/storage/’ directory. Problem with removal can occur if LVM volume is not correctly added or removed in the command line.

Leave a Comment